VP: Customer Attribute now to helps you to collect additional informations directly from your customers in an easy way.
When customers register an account in your store, you want to collect more information like Country, Company,… You are looking for a solution for this issue. Our app Vast Customer Attribute for Shopify is the best choice for you.
Our app focus on some main features:
- Support many type of attributes: single text field, dropdown list, radio select, single checkbox, multiple checkbox, date, static text.
- Add and manage unlimited attributes
- Unlimited customers
- Show customized attributes on registration page
- Multiple themes setup
- Allow shop owner quick to enable or disable attributes
Here is how to setup VP: Customer Attribute app:
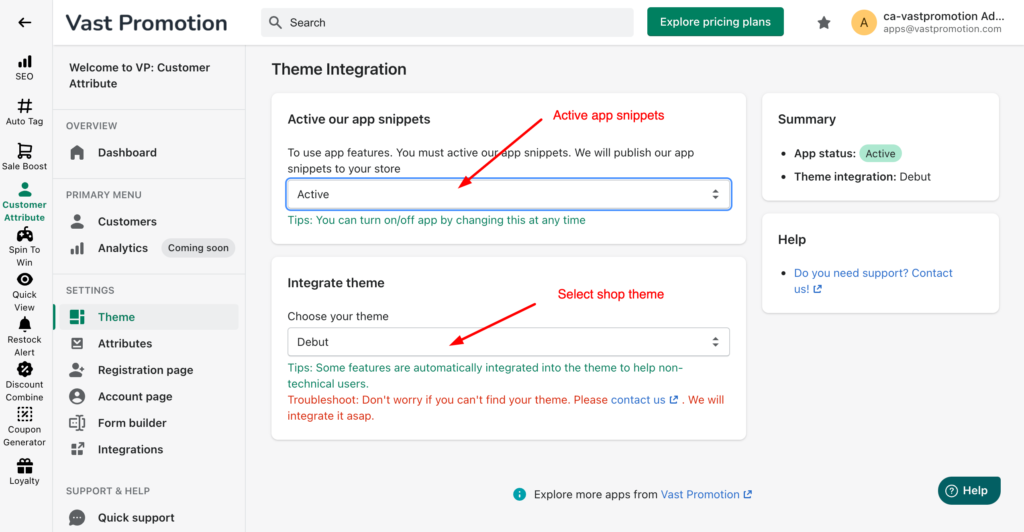
Step 1: Active app snippets
By default, the attributes will not appear immediately on the website. You must setup it manual.
First, click Theme at left navigation. You will see the Theme Integration setup in the right side of your screen. In this page, you must do 2 actions:
- Activate the app snippets
- Select your theme name
Step 2: Create attribute
Attribute is representing a field that the user will fill in information. To create attribute, select Attributes in left navigation. Then click Add attribute

After clicked, you can see the list presets of attribute.
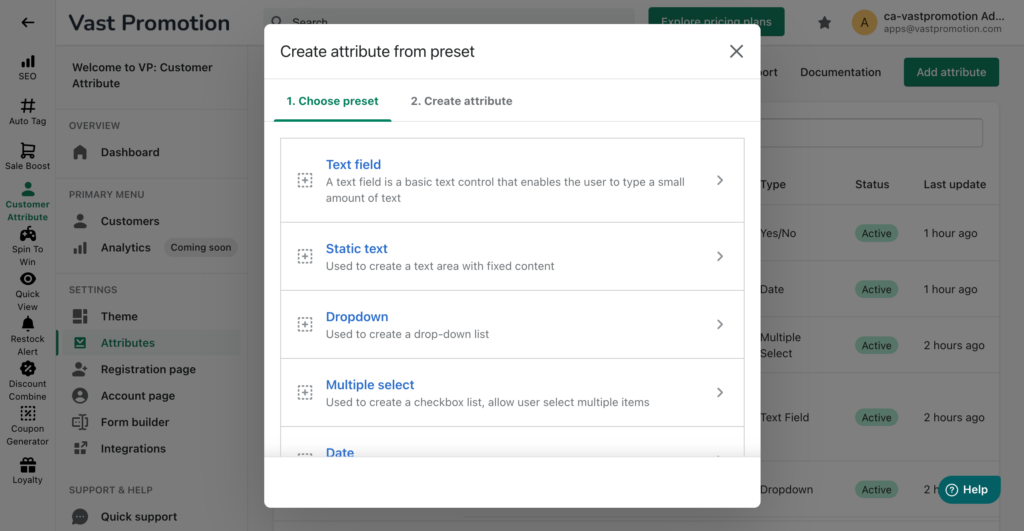
You must select the right type of attribute that you want create. For example. I need an attribute for customers fill in their address. I select Text field preset.
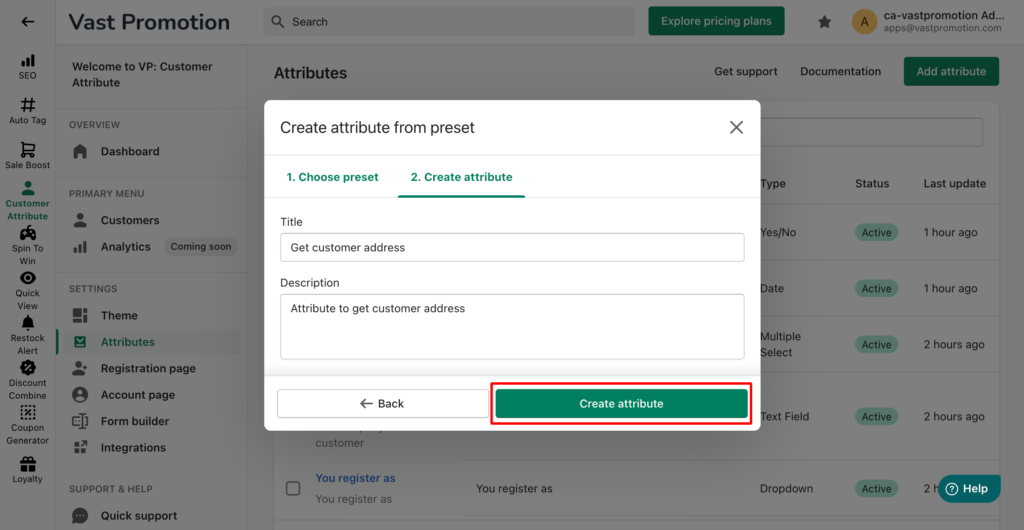
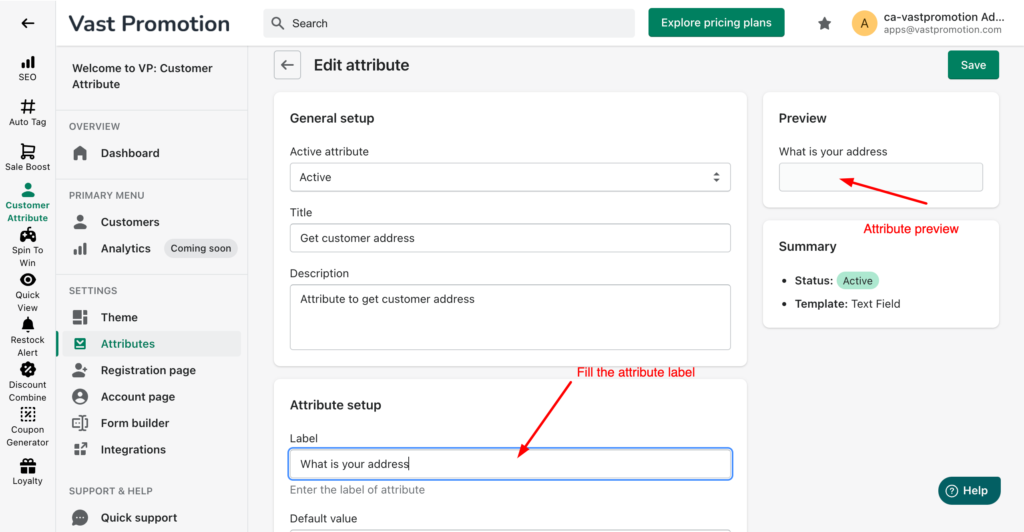
Click Create attribute. Then your screen will navigate to attribute detail page.
In the detail page, you must fill the attribute label and can see preview
Step 3: Add attributes to registration form
Let’s go to setup the registration page. Click Registration page in left navigation. You can see the settings at the right side. There are 2 actions you must do in this step:
- Select Active registration page
- Add attributes that you want customer fill in to form fields
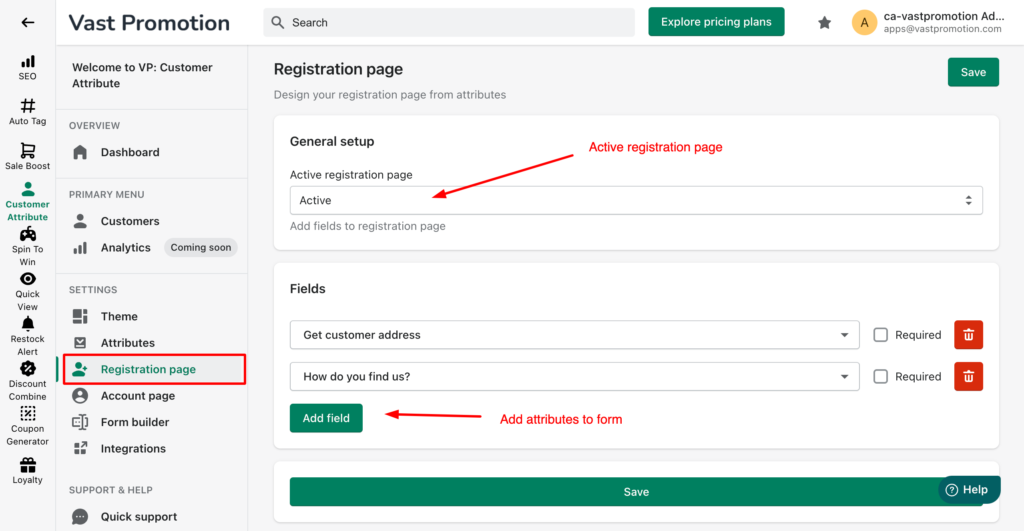
Click Save
Step 4: Go to register page in storefront
Now, the registration form with your attriubtes is display in your store’s register page.