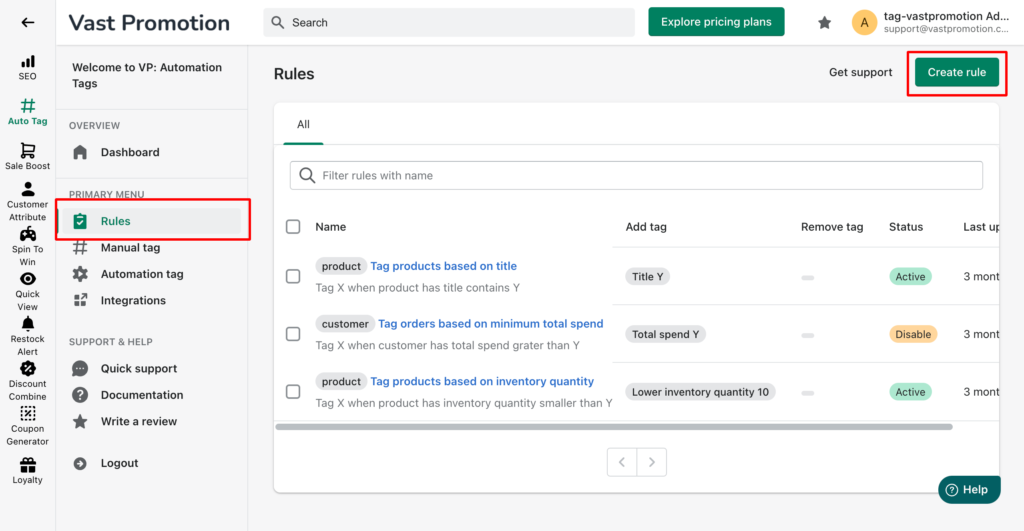
Go to the Rules at the left navigation, then take a look at your right side on the screen. There is a button named Create rule. Click on it.
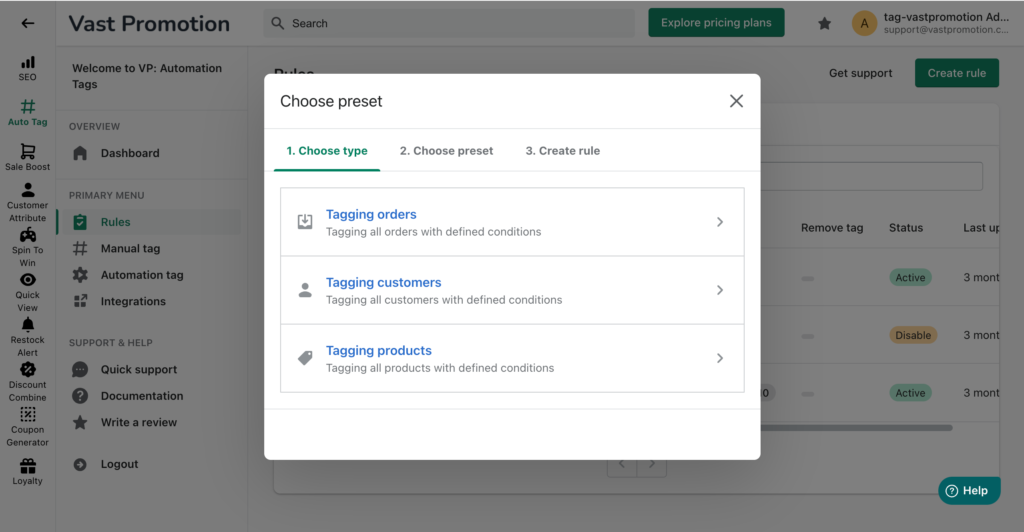
Step 2: Choose type
You can choose on of three types: tagging orders, tagging customers, tagging products
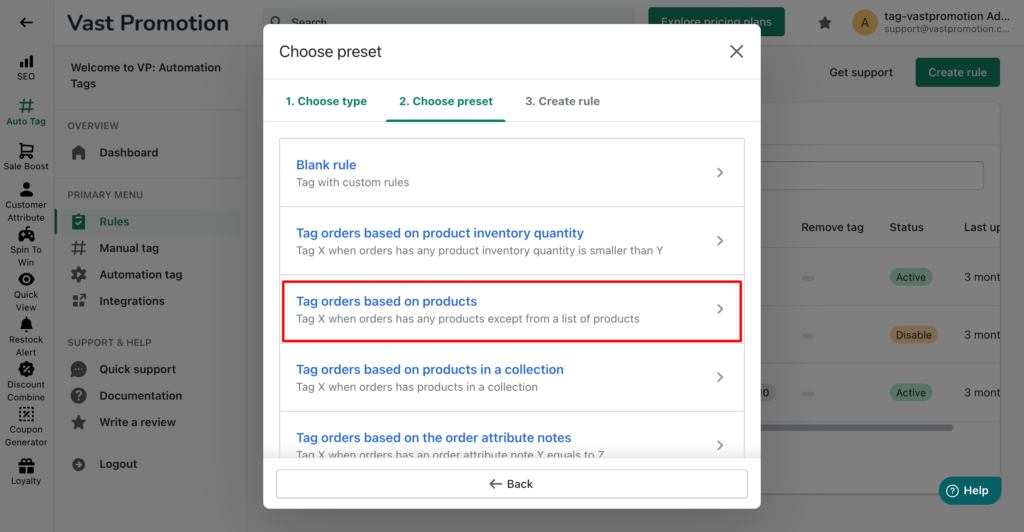
Step 3: Choose preset
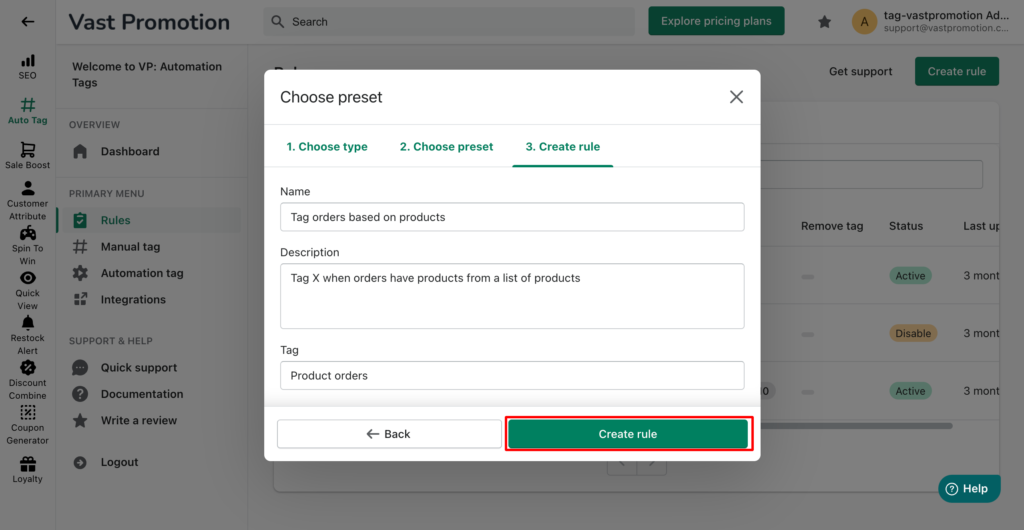
After choosing a type, you will be taken to a new step called Choose preset. In this step, there are a lot of different presets. You can choose one of preset that you want.
For example, after choosing tagging order in step 2, I choose Tag orders based on products preset.
Step 4: Edit the basic information of the rule
You can edit the name, description and the tag of this rule. Then click Create rule button
Step 5: Update rule conditions
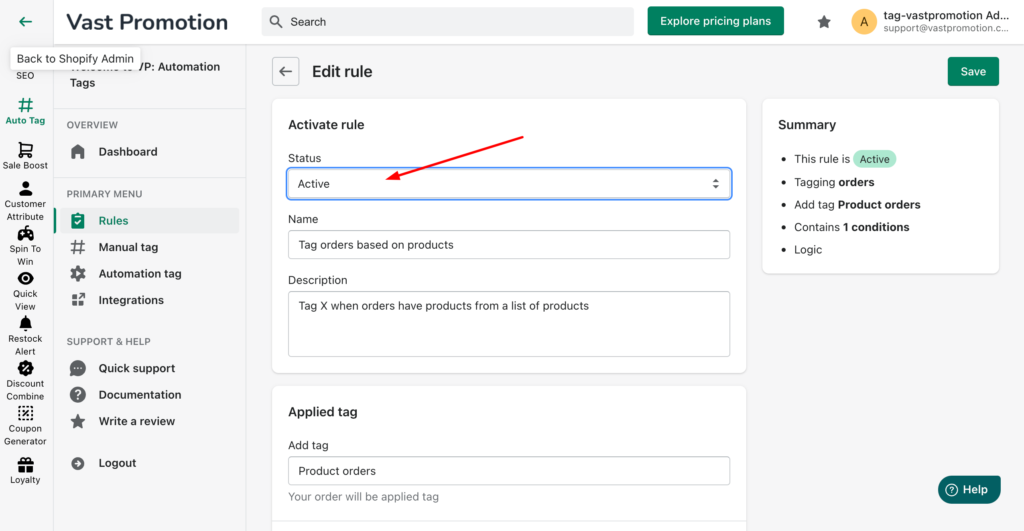
After Create rule in step 4, you will be moved to a new page named Edit rule. In this page, you can edit more information about the rule.
1. Section: Activate rule
Don’t forget to select Active on Status field to active this rule.
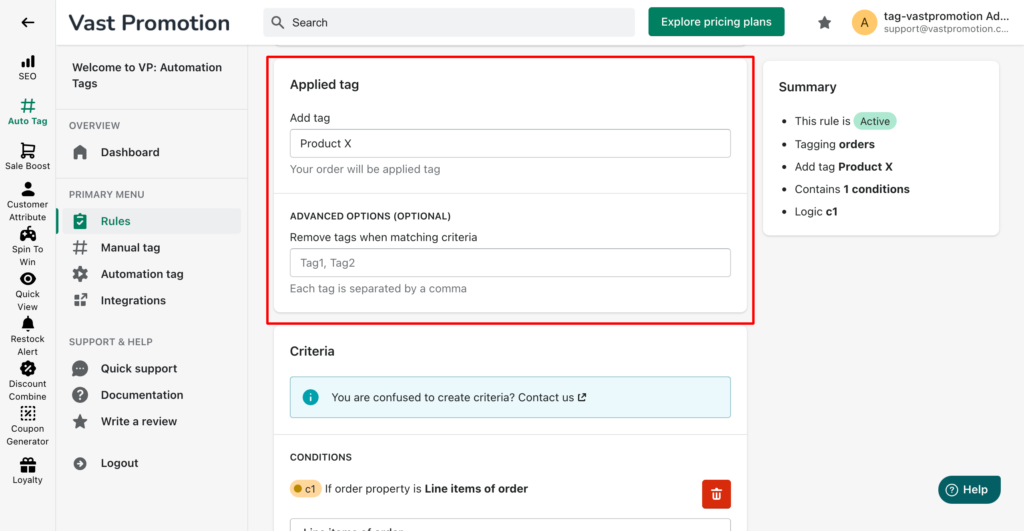
2. Section: Applied Tag
You can add tag or remove tag. For example:
- If you set Add tag Product X: The tag Product X will be added to your order when matching rule conditions. When the order had Product X tag before, our app will skip this order to prevent duplicate the tag.
- If you set Remove tag Product Y. The tag Product Y will be removed from your order when matching rule conditions.
3. Section: Criteria
You can choose the property, the operator for compering with the value. You can combine multiple conditions with or and and.
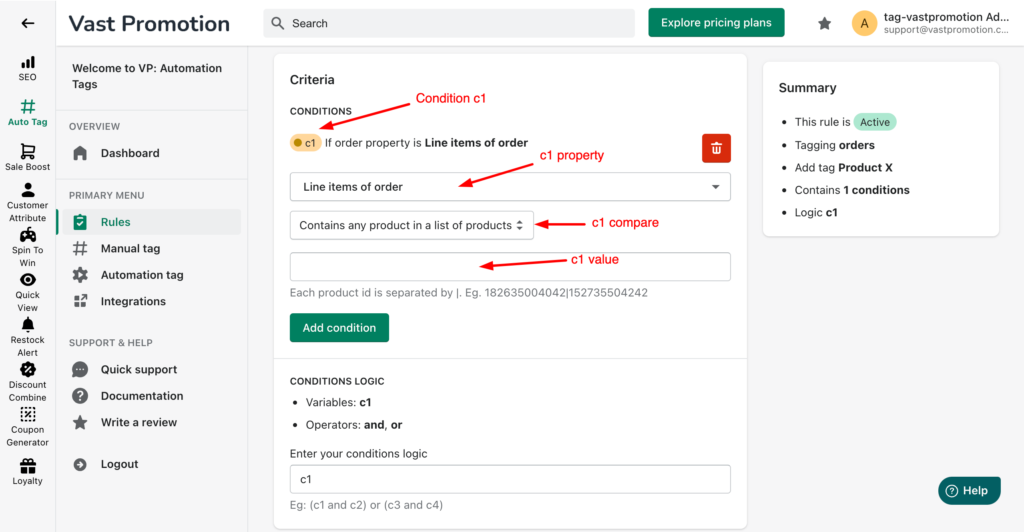
Here is example to combine multiple conditions:
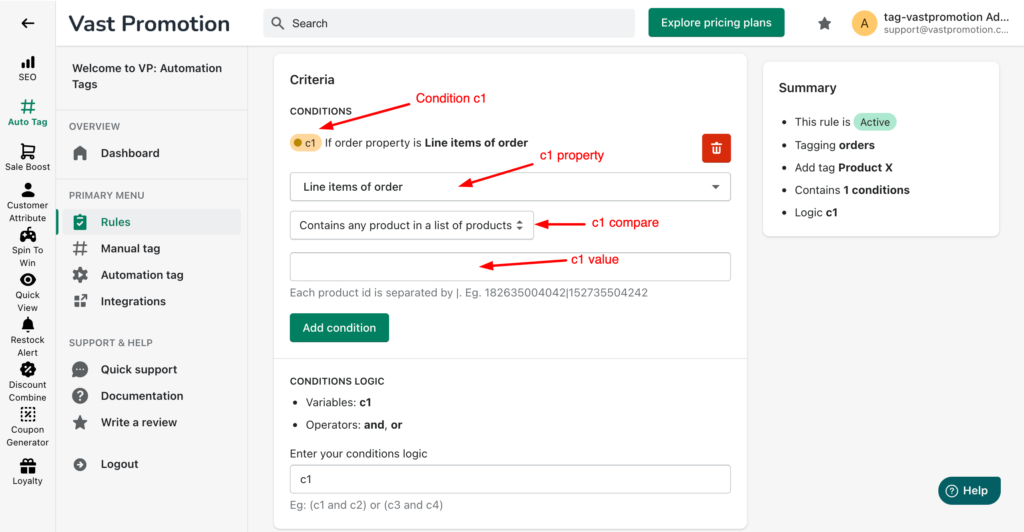
After setup, you click Save button to update the rule.

